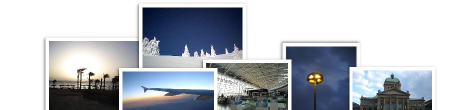
Example for a widget set to compose an email:
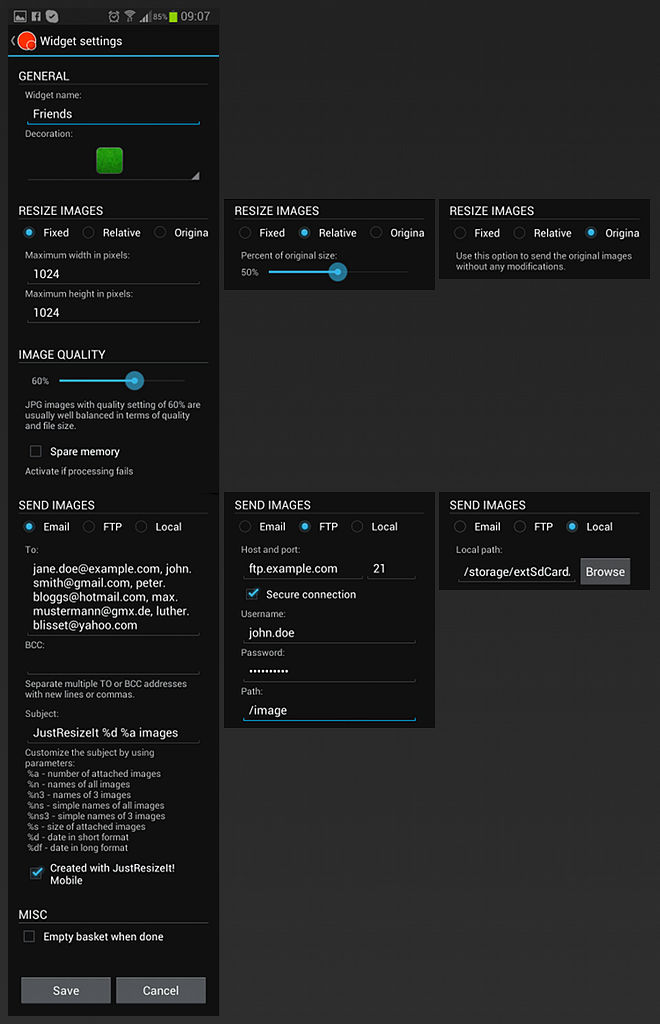
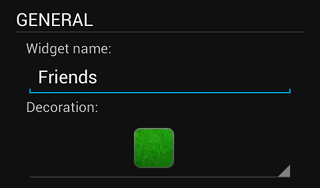
Give a sounding name to the widget and choose a decoration
Fixed
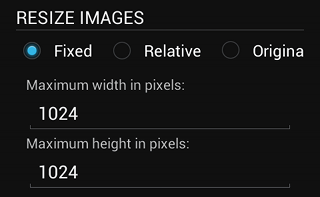
Choose the maximum width and height for the resized image.
Relative
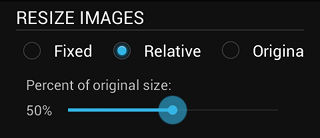
Set the percentage how much smaller the resized image will be.
Original
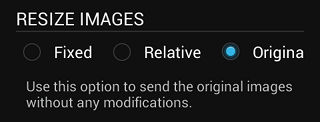
Selet Original to keep the files unchanged.
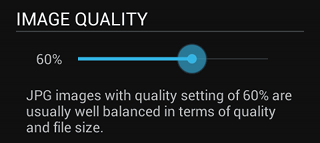
Set the JPG quality of the images.
Visit Tips & Tricks, Image quality to learn what is the best choice.

In some rare cases, usually on older phones, the internal memory is not sufficient for processing the images. Activate "Spare Memory" to run the resizing with less memory. The colors of the images may be slightly alterated.
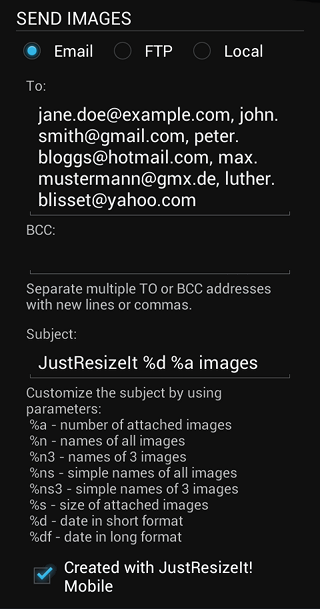
The "To" and the "Bcc" list specifies to whom the images are to be sent.
In the "To" list each recipient can see all other recipients.
In the "Bcc" list each recipient can see only his email. "Bcc" stands for "Blind Carbon Copy".
The addresses have to be separated by commas or new lines.
Define freely the subject of the email message.
You can also use several predefined parameters:
| %n | Names of all images | DSC001.jpg, DSC002.jpg, DSC003.jpg, DSC004.jpg, DSC005.jpg, ... |
| %n3 | Names of the first 3 images | DSC001.jpg, DSC002.jpg, DSC003.jpg |
| %ns | Simple names of all images | DSC001, DSC002, DSC003, DSC004, DSC005, ... |
| %ns3 | Simple names of the first 3 images | DSC001, DSC002, DSC003 |
| %s | Size of attached images | 15.34 MB |
| %a | Number of attached images | 7 |
| %d | Date of email in short format (dd.mm.yyyy) | 15.04.2013 |
| %df | Date of email in full format (Day, d Month Year) | Monday, 15 April 2013 |
Examples:
Enter:
"Latest %a pictures of baby John: %n3 and more (%df)"
to get:
"Latest 7 pictures of baby John: DSC001.jpg, DSC002.jpg, DSC003.jpg, and more (Monday, 15 April 2013)"
FTP
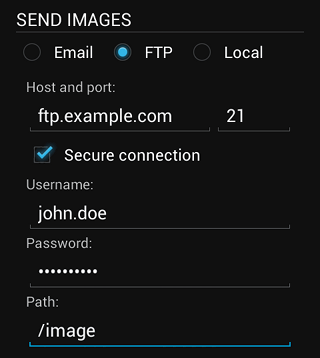
Enter the settings:
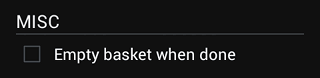
Check "Empty basket when done" to remove all pictures from the basket when the resizing and sending is done.
Leave "Empty basket when done" unchecked if you want to reused the pictures in the basked for another sending. In example, you can send images per email to your family, then remove the very private ones and send the rest to your friends or upload them to an online gallery.
JustResizeIt! is a product of
![]() Perspectives
Perspectives
Software Solutions GmbH, Zurich, Switzerland.
Visit us at www.perspectives.ch

Please visit our
PRESS corner
You will find press releases, ready to use articles, graphical material and other usefull information.